These last several weeks have seen lots of continuing activity on our big organ transplant. I’ve had a bit less time to work on the project, having been doing some traveling for work, but progress has been steady none-the-less. The list of tasks left to do is getting shorter, the pile of organ parts in the Choir Room is shrinking, and it’s starting to feel like we’re approaching the home stretch.
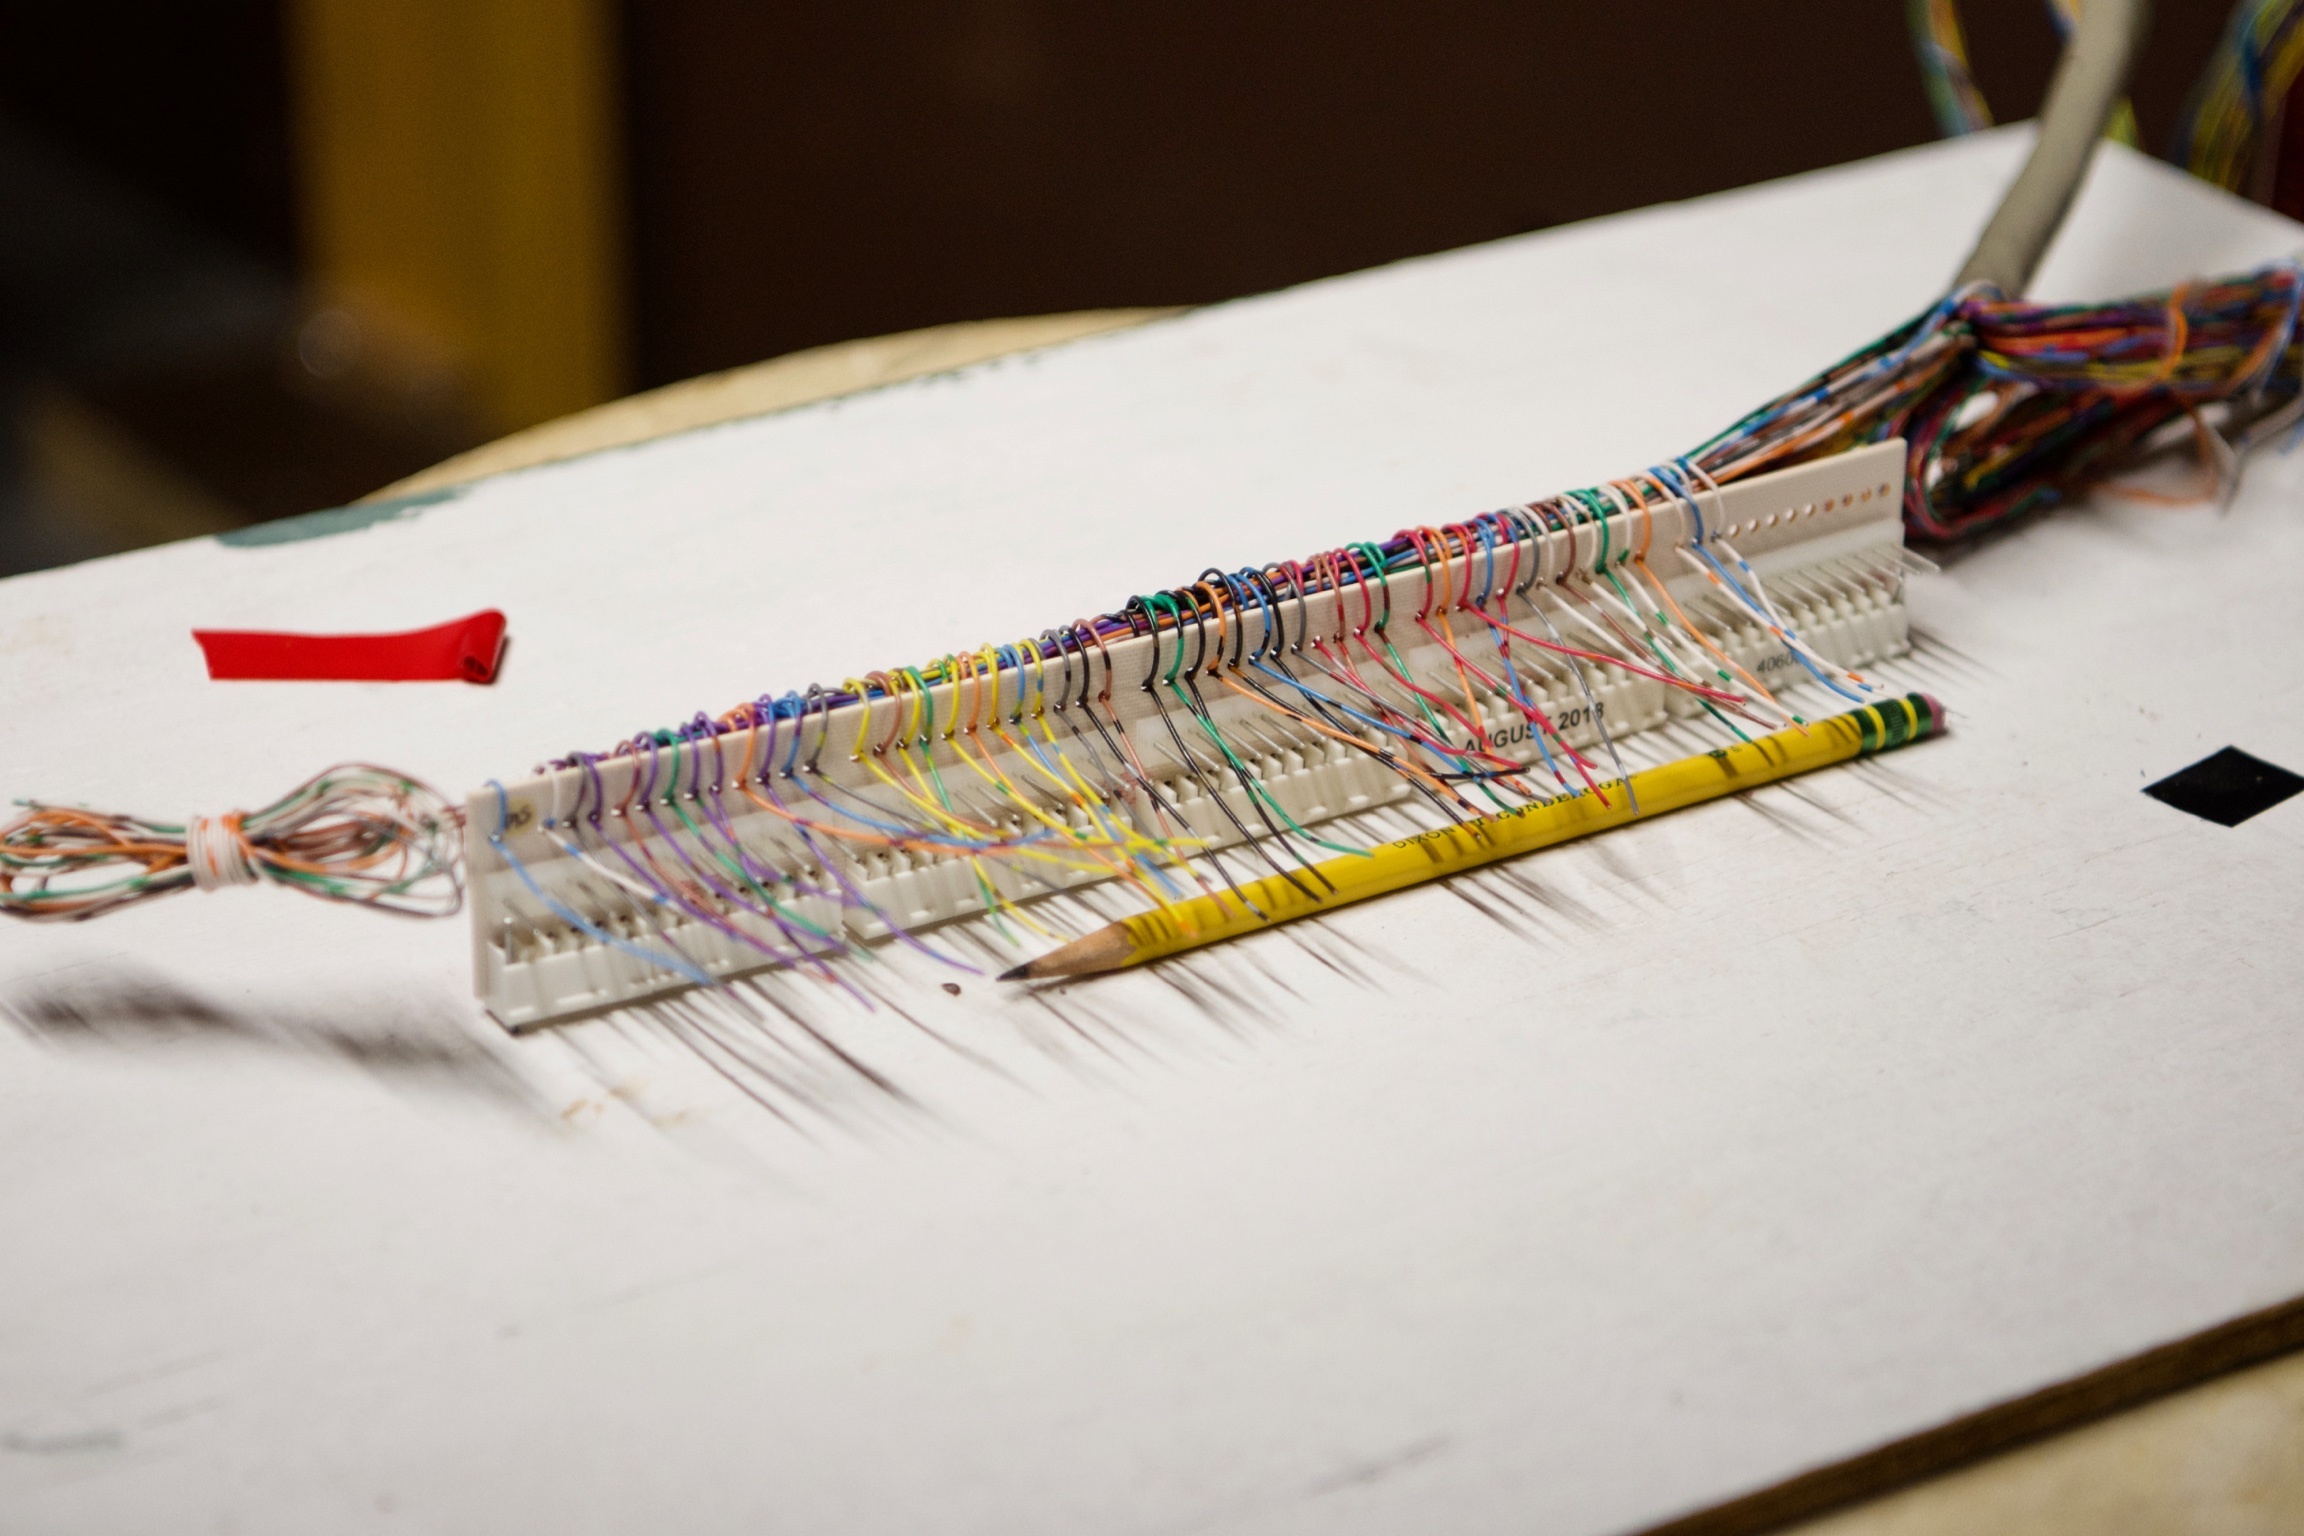
Much of our time has been taken up by the big job of wiring the relay. That bit is almost complete thanks to the efforts of multiple volunteers, who are now becoming expert organ electricians! We’ve finished the signal wiring for all of the wind chests that are currently installed. The only signal wiring left is for the the new display chest, which is almost complete in the shop (more on that below). When that arrives, we can wire it up to the last few boards on the relay, and call it done!
Aside for the signal wiring, we are also working on the return wiring. For anyone who doesn’t know, electrical circuits must have two current paths: one going to the load (the thing being powered), and another path going back. All of the little wires we’ve been connecting from the foot boards to the relay so far are the “signal” wiring, or the current path out to the electromagnets that open wind valves (the “load”). We are also now installing the wiring that forms the return path back from those electromagnets. Fortunately, there isn’t nearly as much to do for that part. We just need to connect each foot board together with a couple of short jumper wires, and then each of the wind chests gets one wire that goes back to the negative terminal on the relay. The tough part though, is that the return wires connect on the undersides of the main wind chests, so the work is all overhead. 🙁
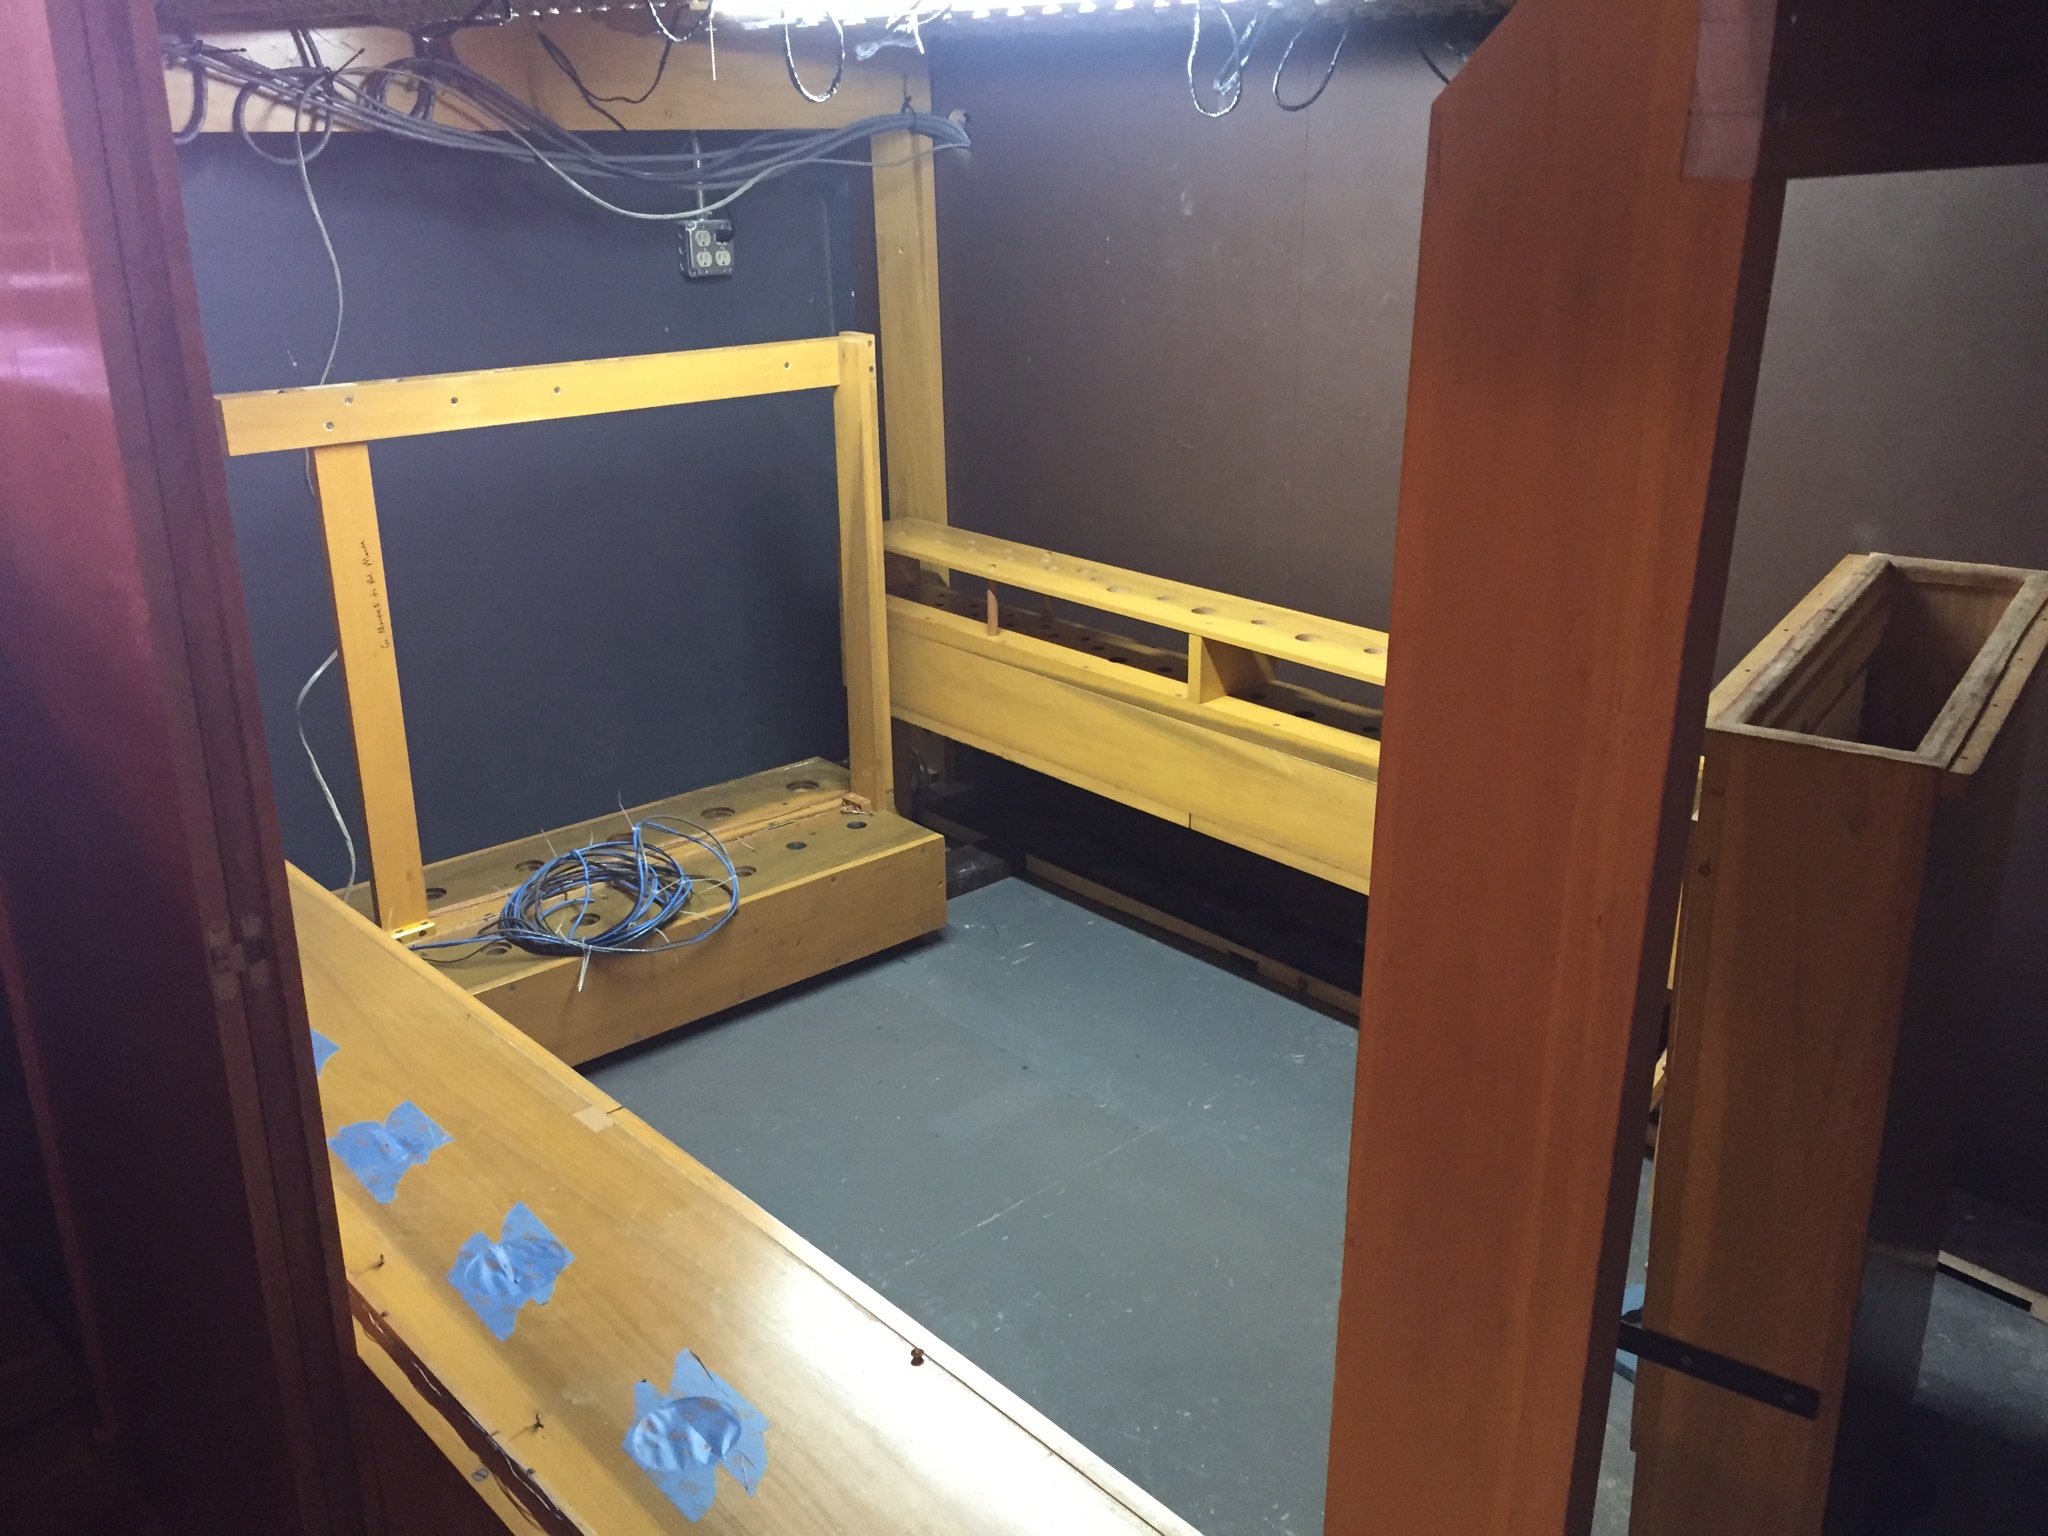
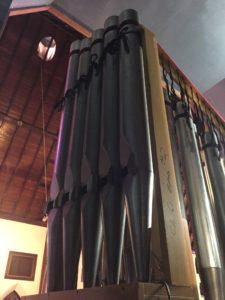
Another major item that’s been accomplished is the placement and wiring of the “offset” wind chests. You may remember the photos of the four large wind chests in the Choir Room. These hold most of the organ pipes, but they’re too crowded to hold the big pipes. These larger pipes get put on their own wind chests, which are squeezed in wherever they can go. Some of these offset chests hold only 12 or so (big) pipes, whereas the main chests might hold up to 400 or 500 pipes. All of the offset chests have now been put in place, and things are starting to get crowded in the chamber. We have chests around all available sides of the great chamber, as well as underneath the main wind chests, and more in the swell chamber just inside the door. The ones in the swell chamber are for really tall pipes, so they also have sky racks that go up to hold them. When all of the pipes are installed in there, they’ll go almost all the way to the ceiling in some places.

We did run into a bit of a problem while installing the offset chests in the swell chamber: it turns out the location of the original plug outlet and light in there are going to be in the way of the 16′ Trumpets. Of course that wasn’t really evident until lots of stuff was installed in front of them (mostly sky racks), so we had to do some re-positioning of those electrical fixtures and outlets to get them out of the way.
Another annoying problem we discovered was with one of the offset chests that holds the five largest Chimney Flute pipes. It sits on the end of one of the big wind chests for the great organ. When we installed it, we discovered that one of the swell shutters was hitting it when in the full open position. It was only about 1″ too close, but we couldn’t move the chest from it’s position without obstructing other things elsewhere. Tony came up with the brilliant idea of moving it over to the other great wind chest where it would actually make access to the walk board up there much easier as well. That only required that we: remove the pipes, dis-assemble the sky rack and the chest, cut new holes to provide it with wind, and re-assemble the whole thing. In reality, it wasn’t too bad, and it is in a much better spot now. (I did have to disassemble it again later to cut more/bigger holes to provide wind to the new display chest, but by that time I was getting pretty fast at the whole process!)
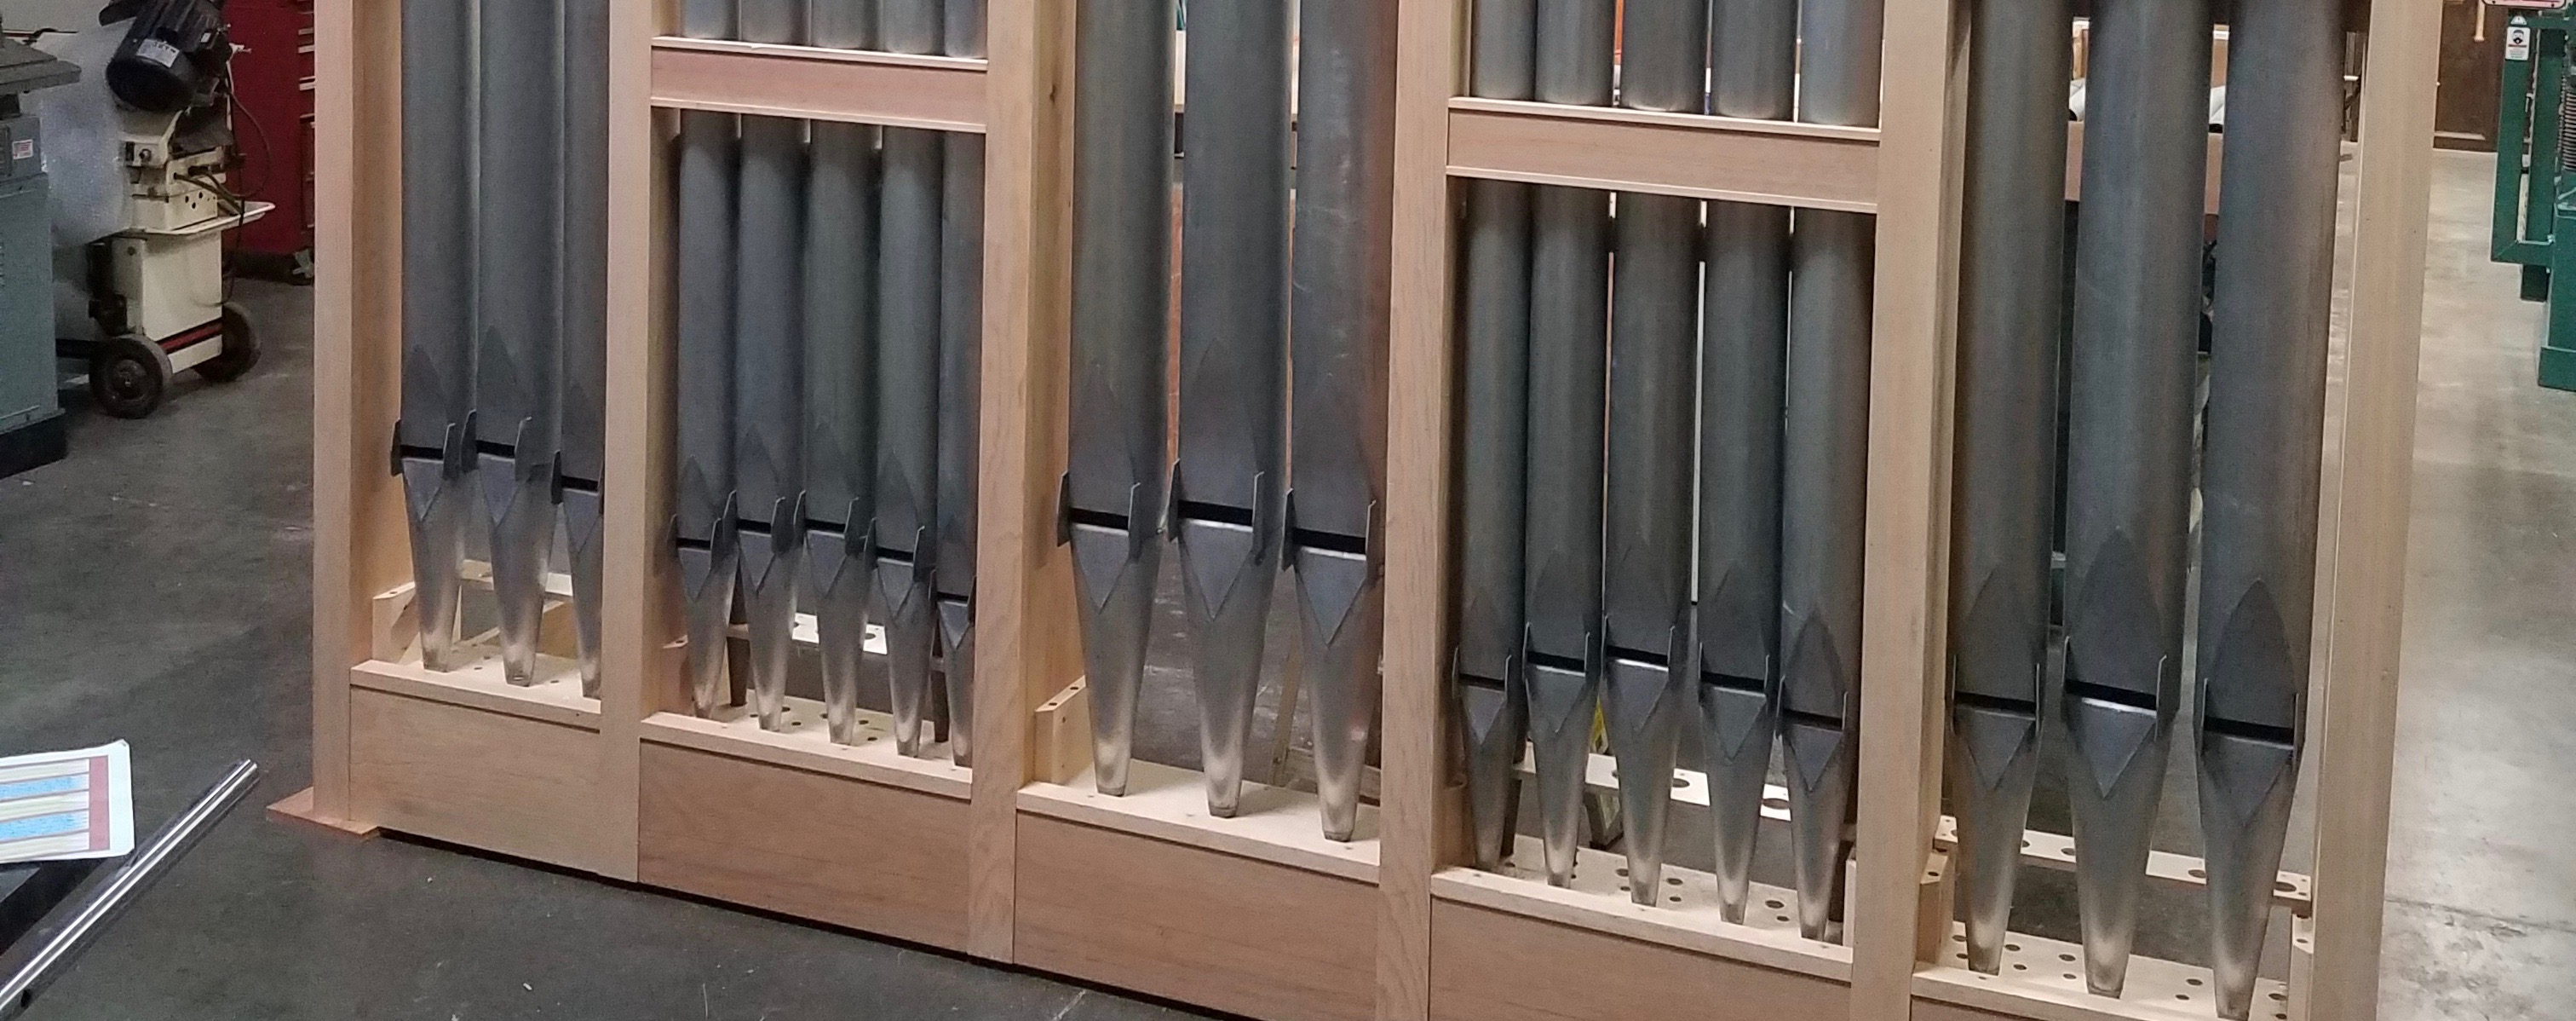
Speaking of wind chests, we’ve also got our first look at the chest and racks that will hold the large display pipes, which will form the facade of our organ. This chest will sit on top of the partition wall immediately behind the last choir pew. It will overhang the partition by about 10-12 inches, so the men in the choir will actually be sitting underneath them. Some of the largest pipes in the organ will be visible extending up from this chest, and will form a majestic wall of pipes that will reach almost to the ceiling. This part of the organ is being constructed at Hupalo and Repasky’s shop in San Leandro, and should be arriving here in a week or so.

Finally, we’ve been doing the preliminary work for “winding” the organ. “Winding” is just the organ builders’ way of talking about installing the ducts that carry pressurized air to all the various parts of the organ – the wind chests, reservoirs, and regulators. So far, this has included figuring out where air ducts need to go and, where necessary, cutting holes to let air pass in and out of the wind chests. We also got our new blower installed in the blower shed outside the church. As I installed the blower, I realized that that little shed is actually a very specially-constructed chamber. It’s designed to be air-tight. It has an intake duct coming from the organ chamber (with air filters on it), and an output duct going to the organ. Unfortunately, the wood on the doors of the shed is rotten, and the doors are falling off their hinges. This has allowed dusty outside air in, which isn’t that good for the blower nor for the organ. It looks like we have a bit of re-building to do on those doors.
A list of our recent work includes:
- Finished routing, connecting, and soldering all of the available signal wiring to the relay (whew!)
- Started installing the return wiring to the relay.
- Wired the console keyboards to the realy
- Installed the new blower
- Moved an electrical outlet and light fixture
- Installed a mounting board for the rectifier and associated circuit breakers
- Reposition the bass Chimney Flute offset chest to eliminate conflict with the swell shutters.
- Cut holes in the bass Chimney Flute offset chest to wind the display chest
- Installed and wired various offset chests
- Installed sky racks for the larger pipes
- Re-sized and reamed the rack board holes for the Tierce rank in the swell division; installed all the Tierce pipes
- Removed most of the parts of the old Moeller Organ
We’ve really had some dedicated work from our volunteers these last few weeks. Wiring the relay can be very tedious, but everyone has stepped up and pitched in. Thank you!
- Tony Nickel
- Susan Cavalieri
- Allison Gong
- Rogan Lynch
- David Folsom-Jones
- Carol & Murray Walker
- Liz Wesolowski
And here’s a link to a video about a recent organ rescue and restoration that happened in Evansville, IN:
Giesecke pipe organ restored and returned to Evansville
The pile is getting smaller A wiring board for one rank. Rogan test-fits Sub Bass pipes in an offset chest. 
The problematic Chimney Flutes Offset chests getting squeezed in. Sky racks in the swell chamber. 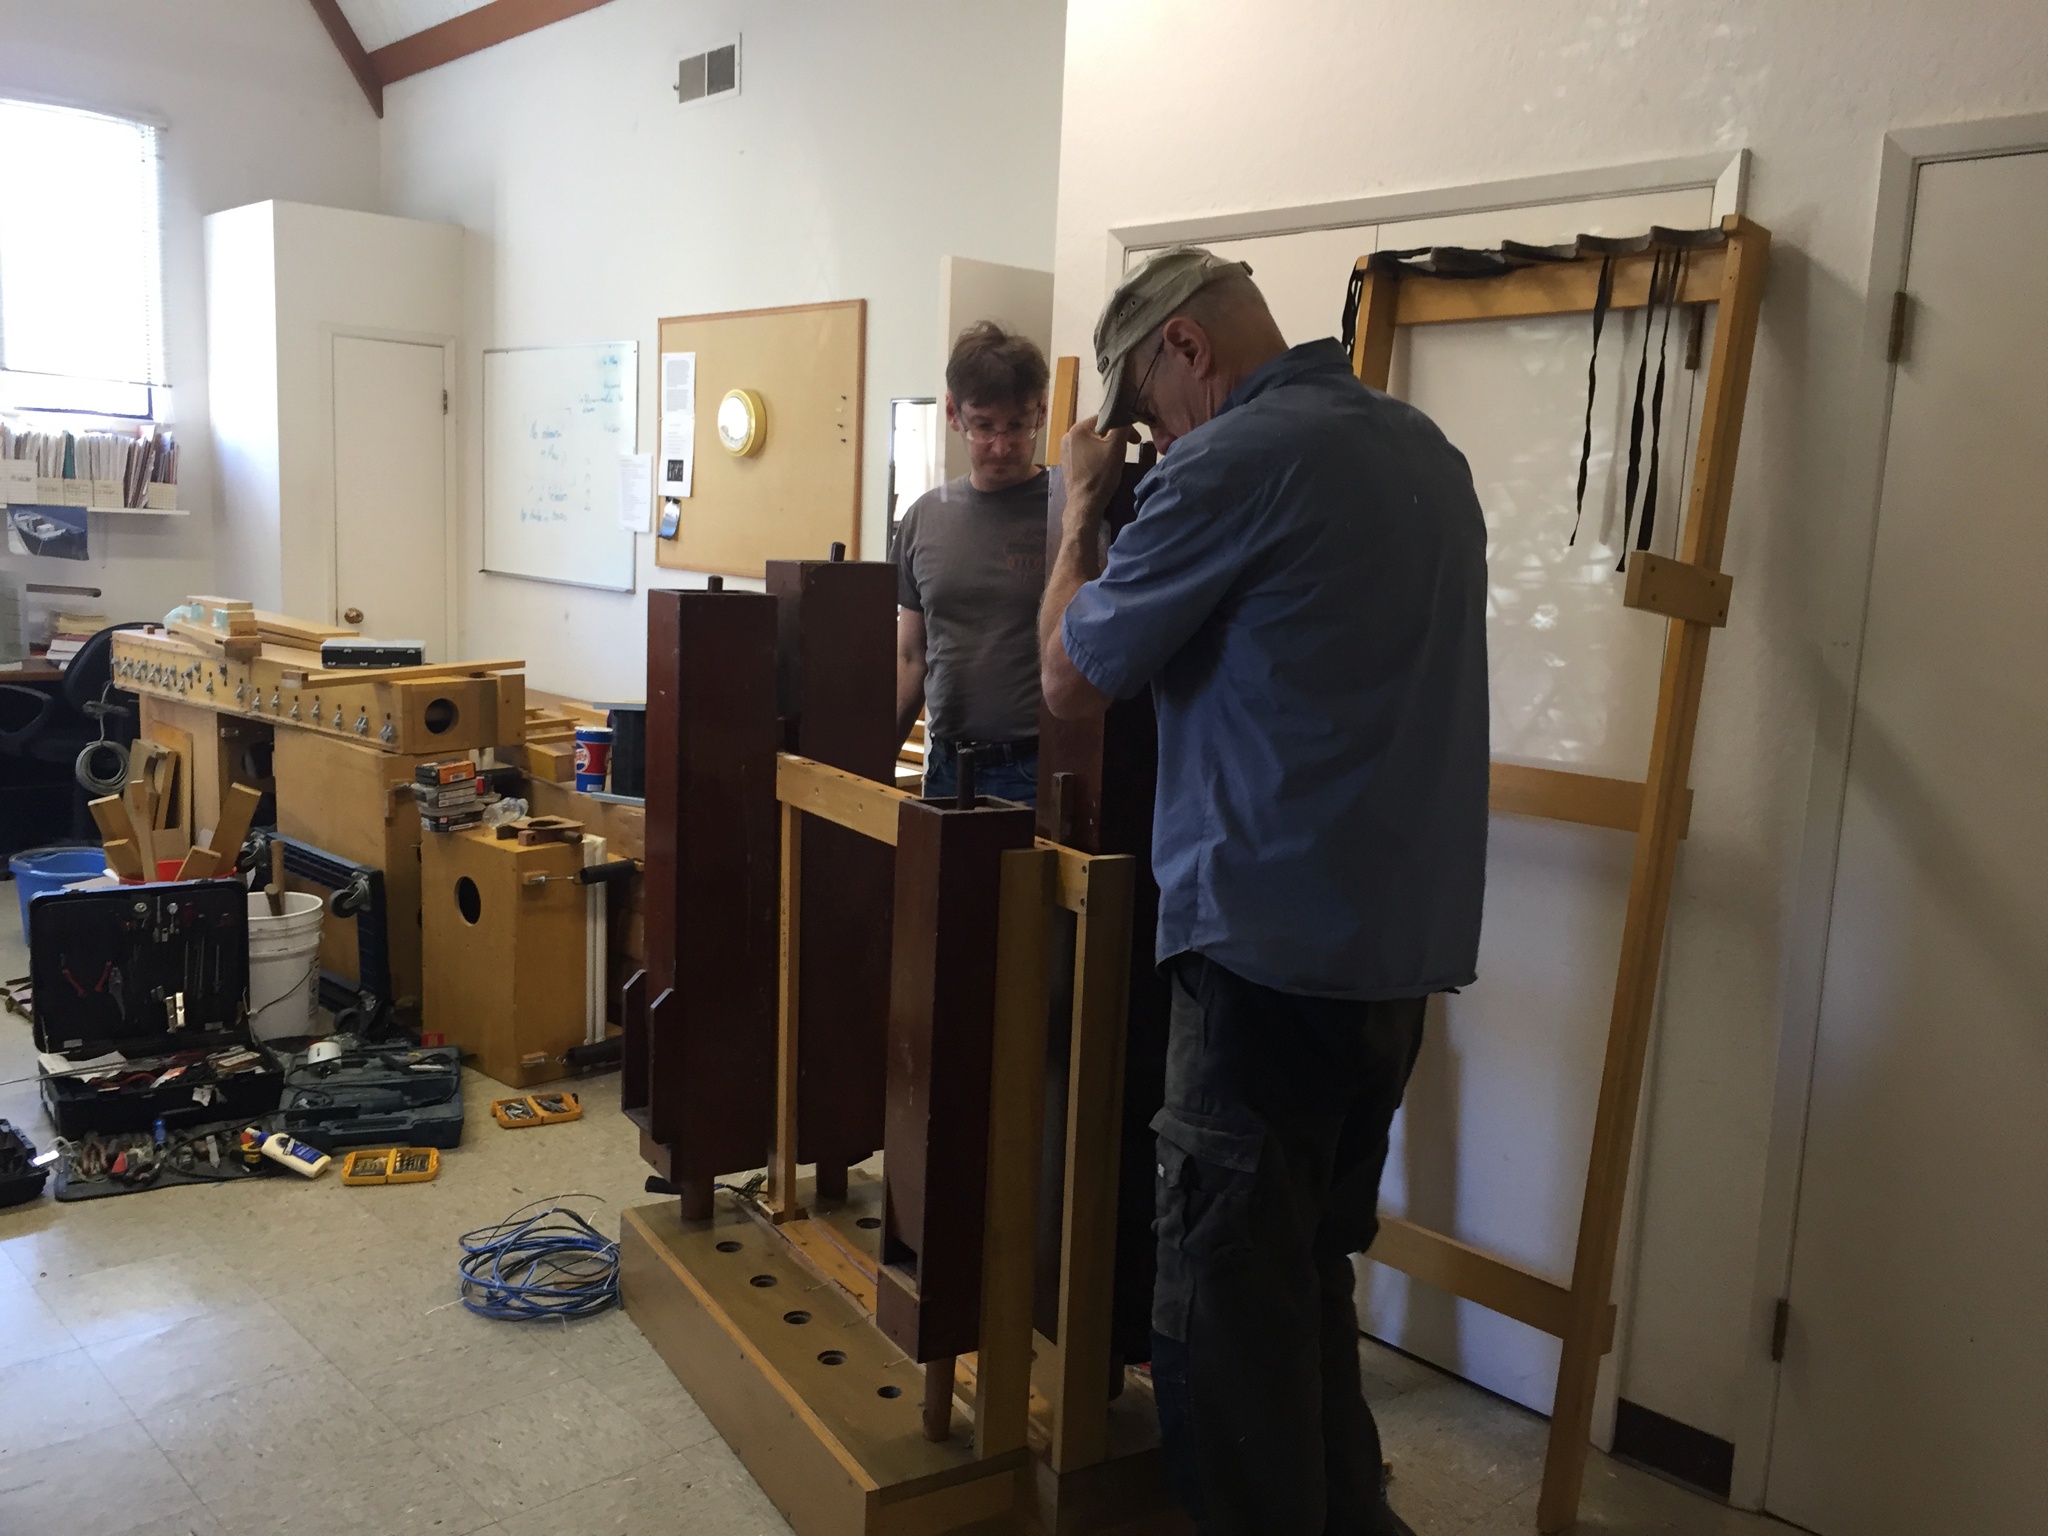
Bill and Rogan working on the Sub Bass rank Our new display facade! 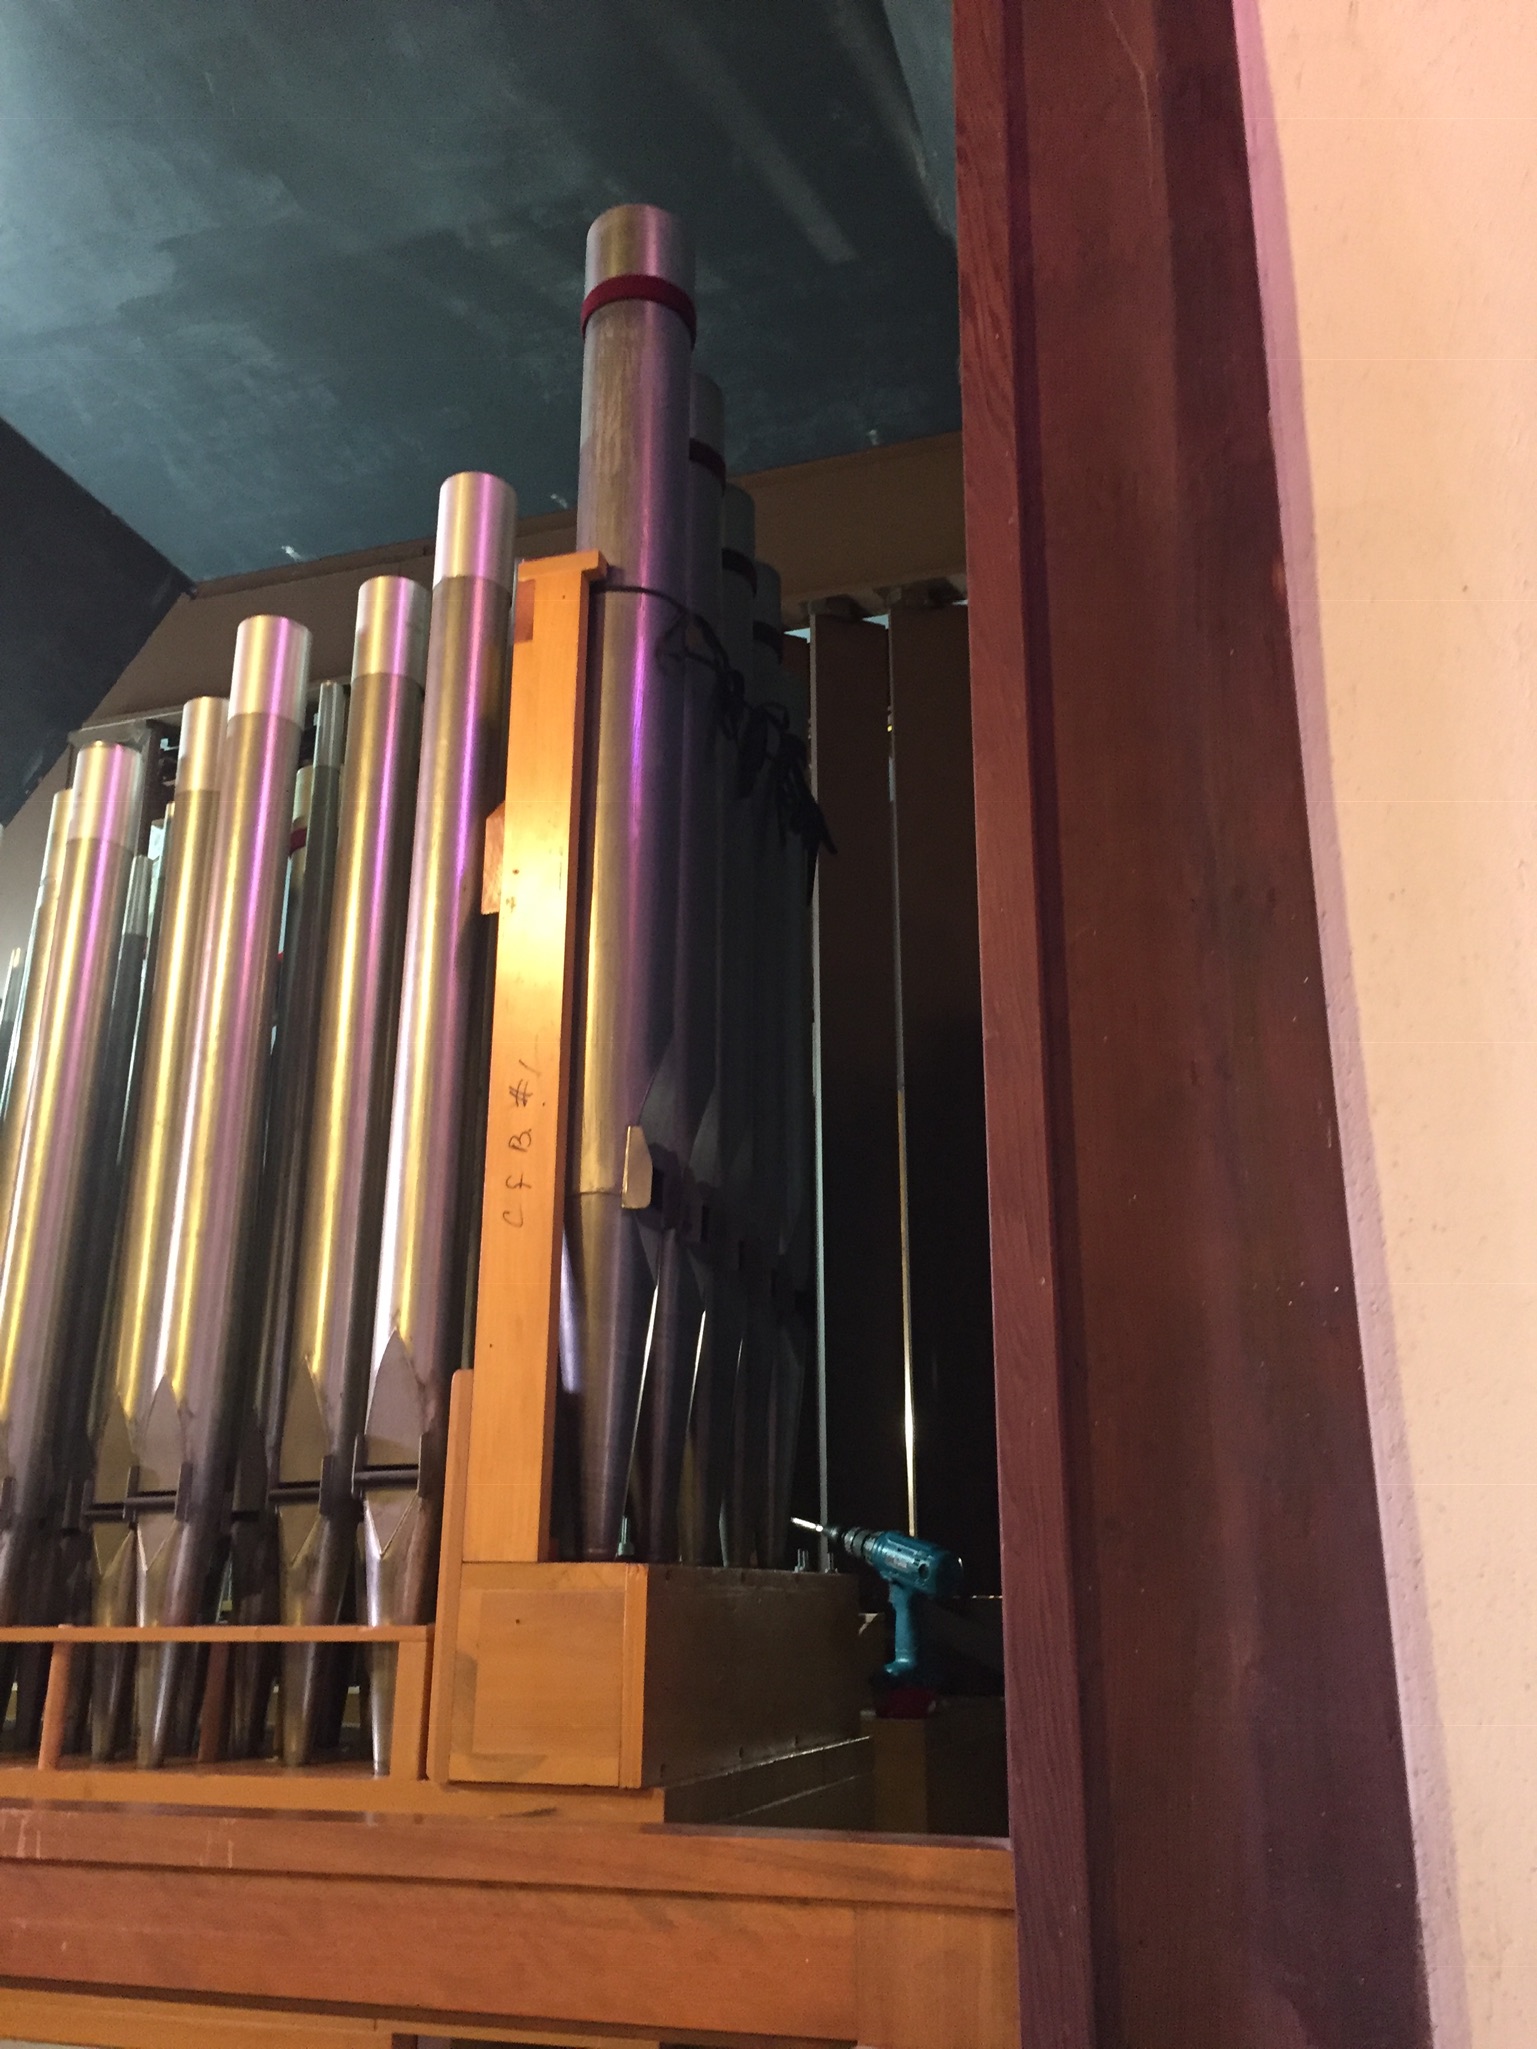
Bass Chimney Flutes 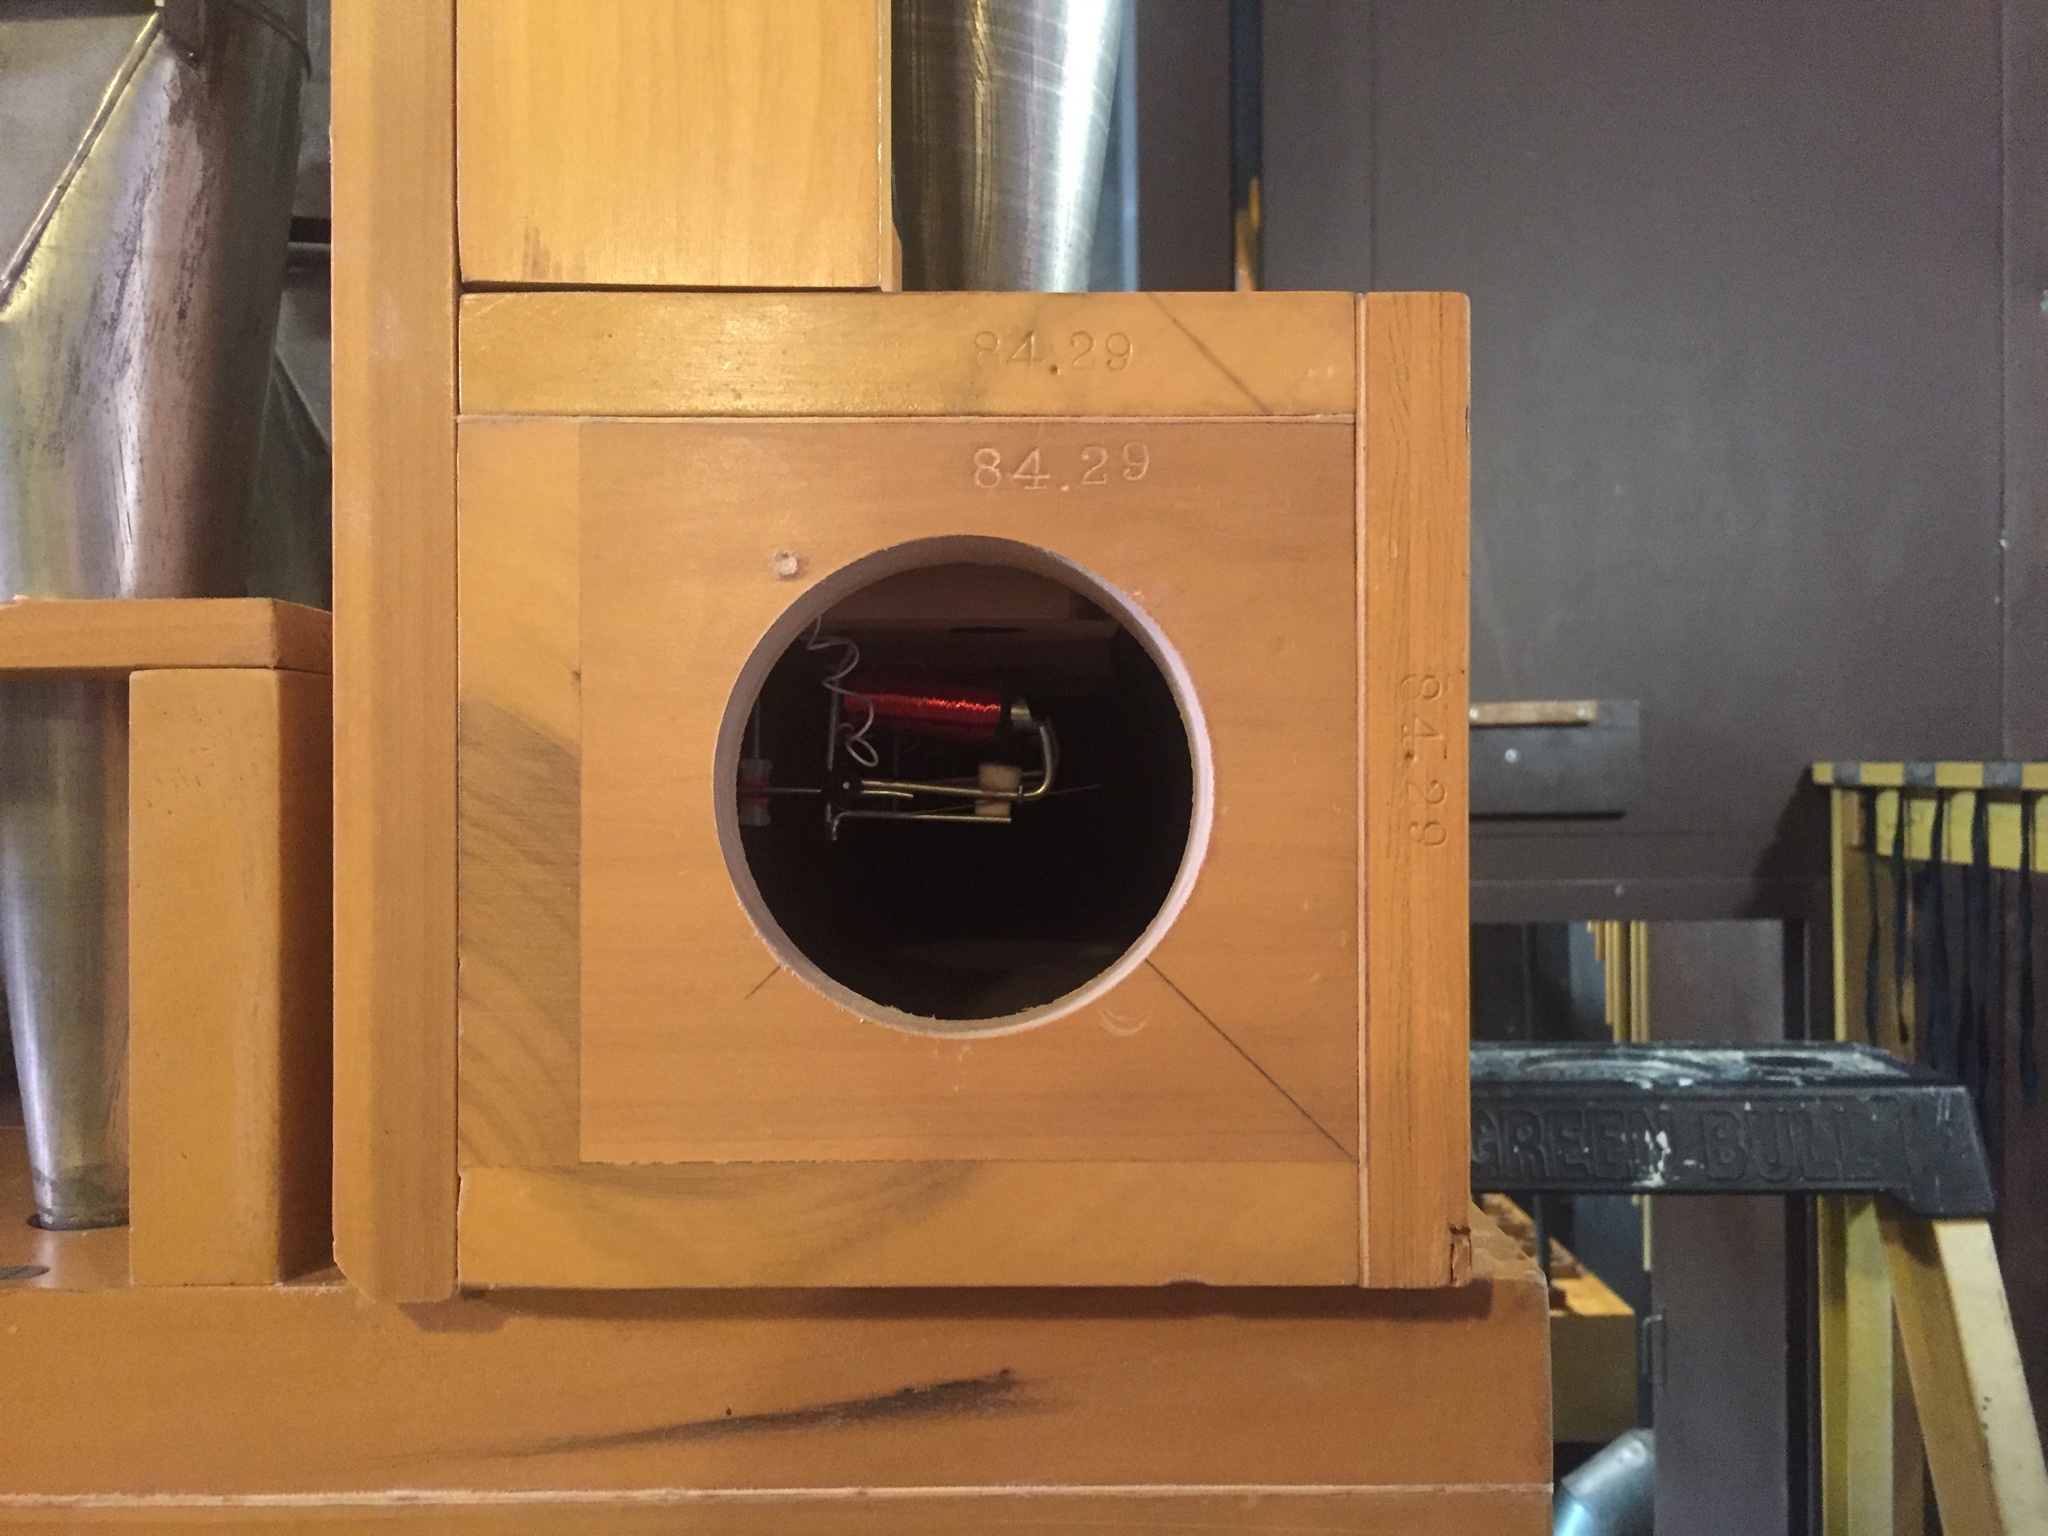
A hole to provide wind to the display chest. 
New offset chests in the swell chamber 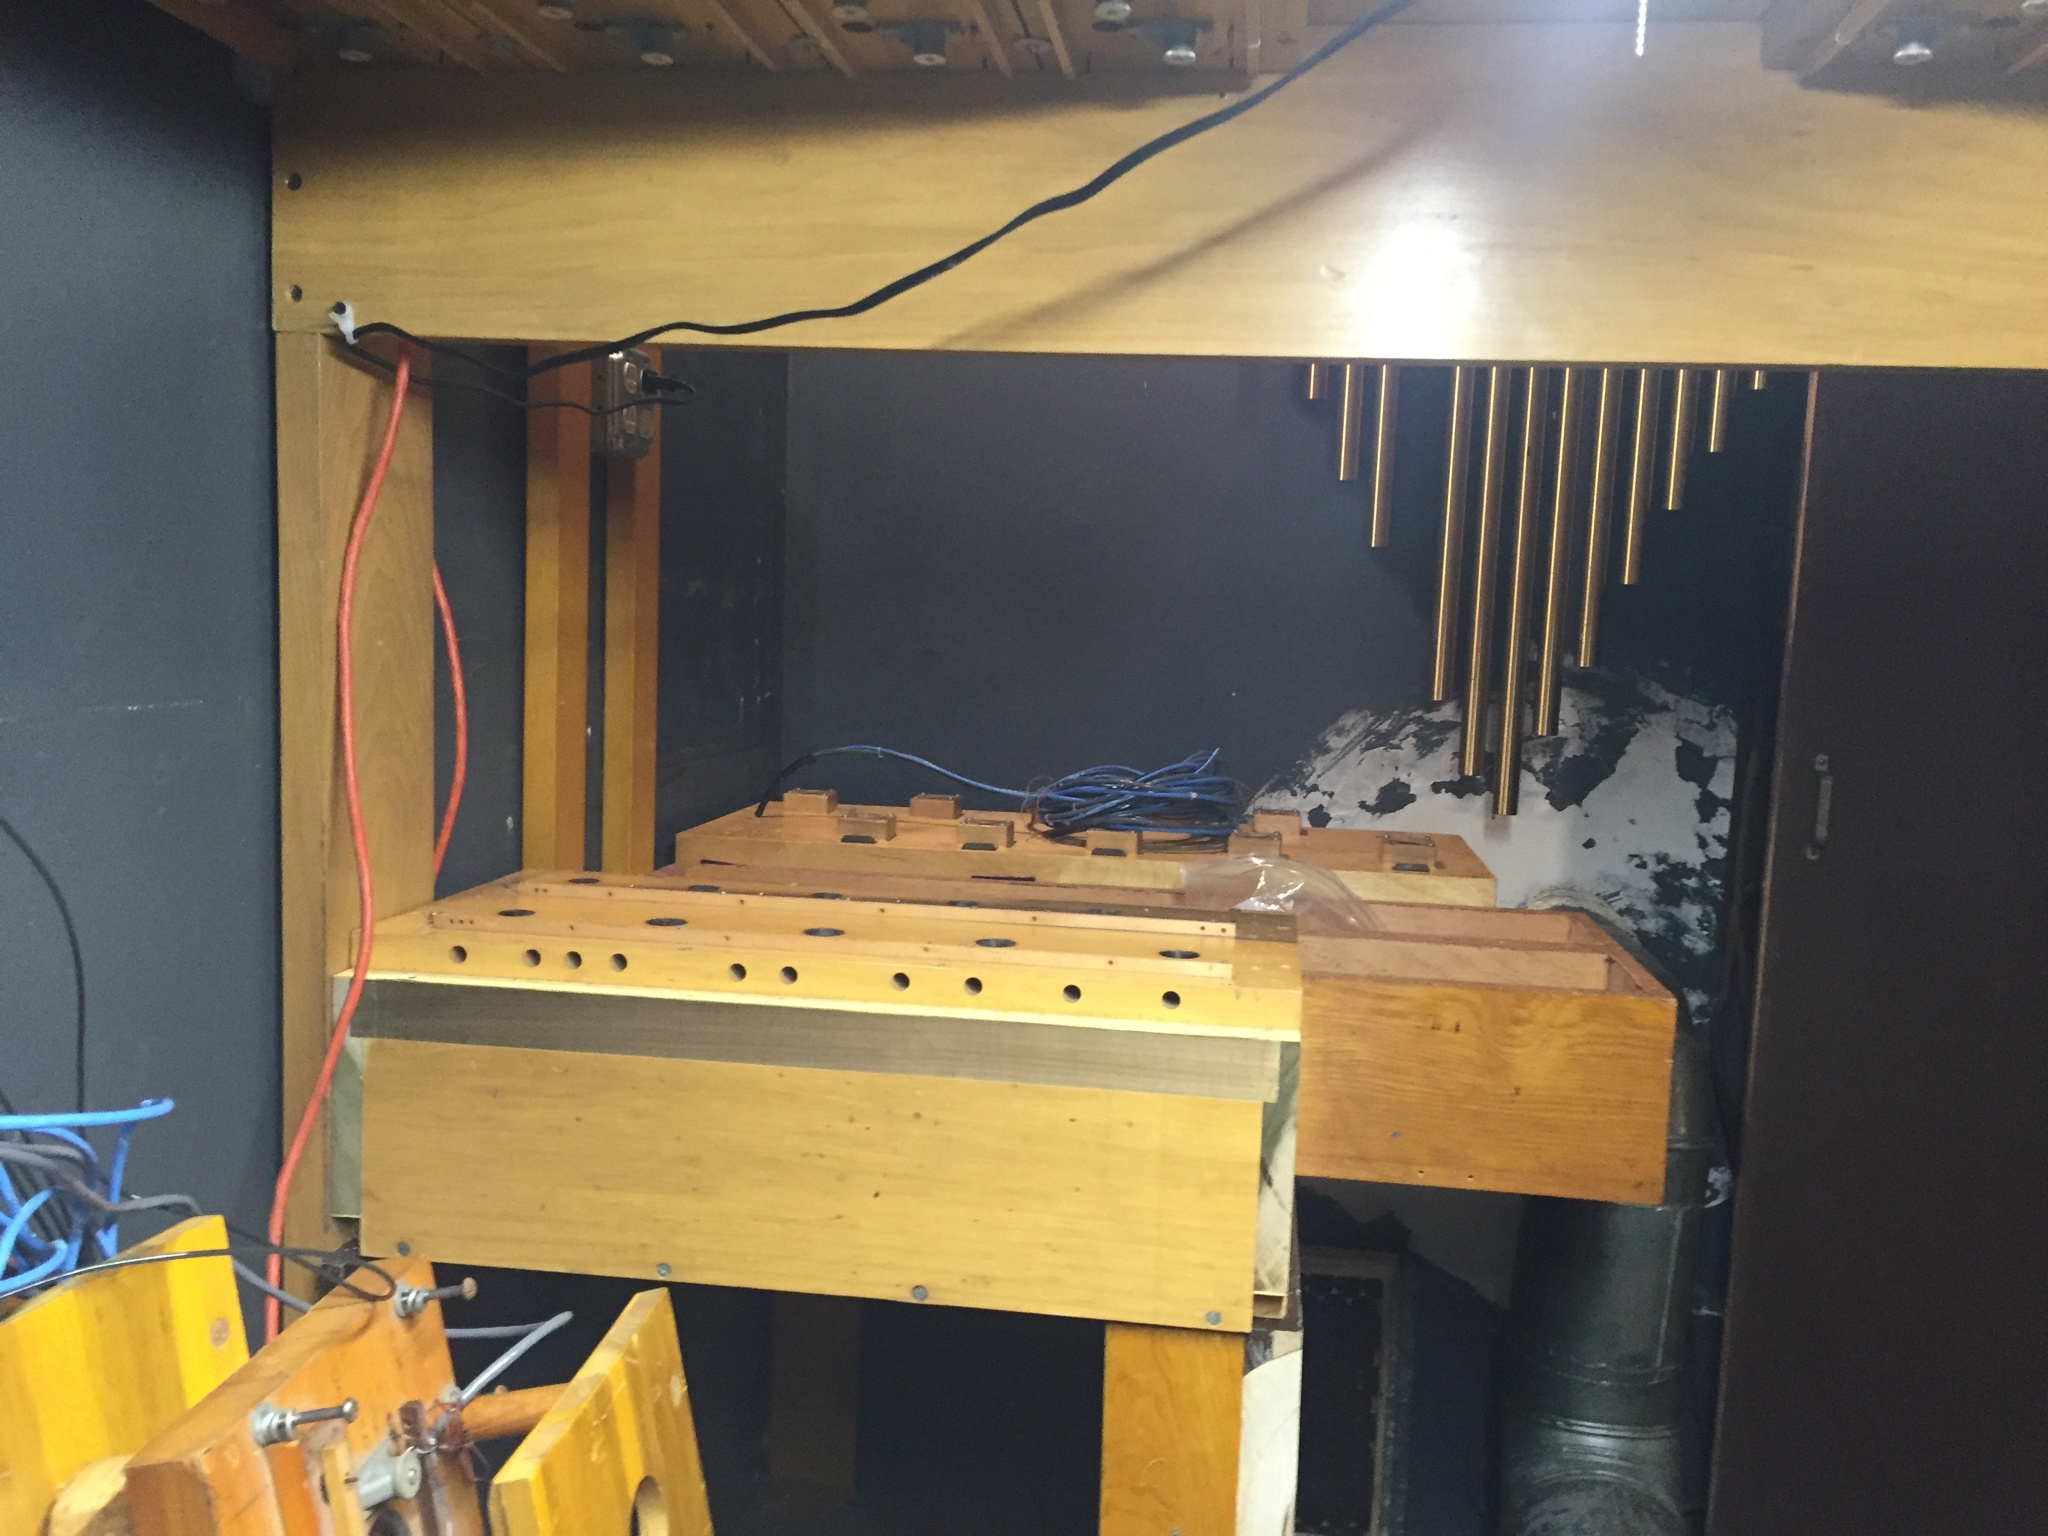
Offsets in the swell 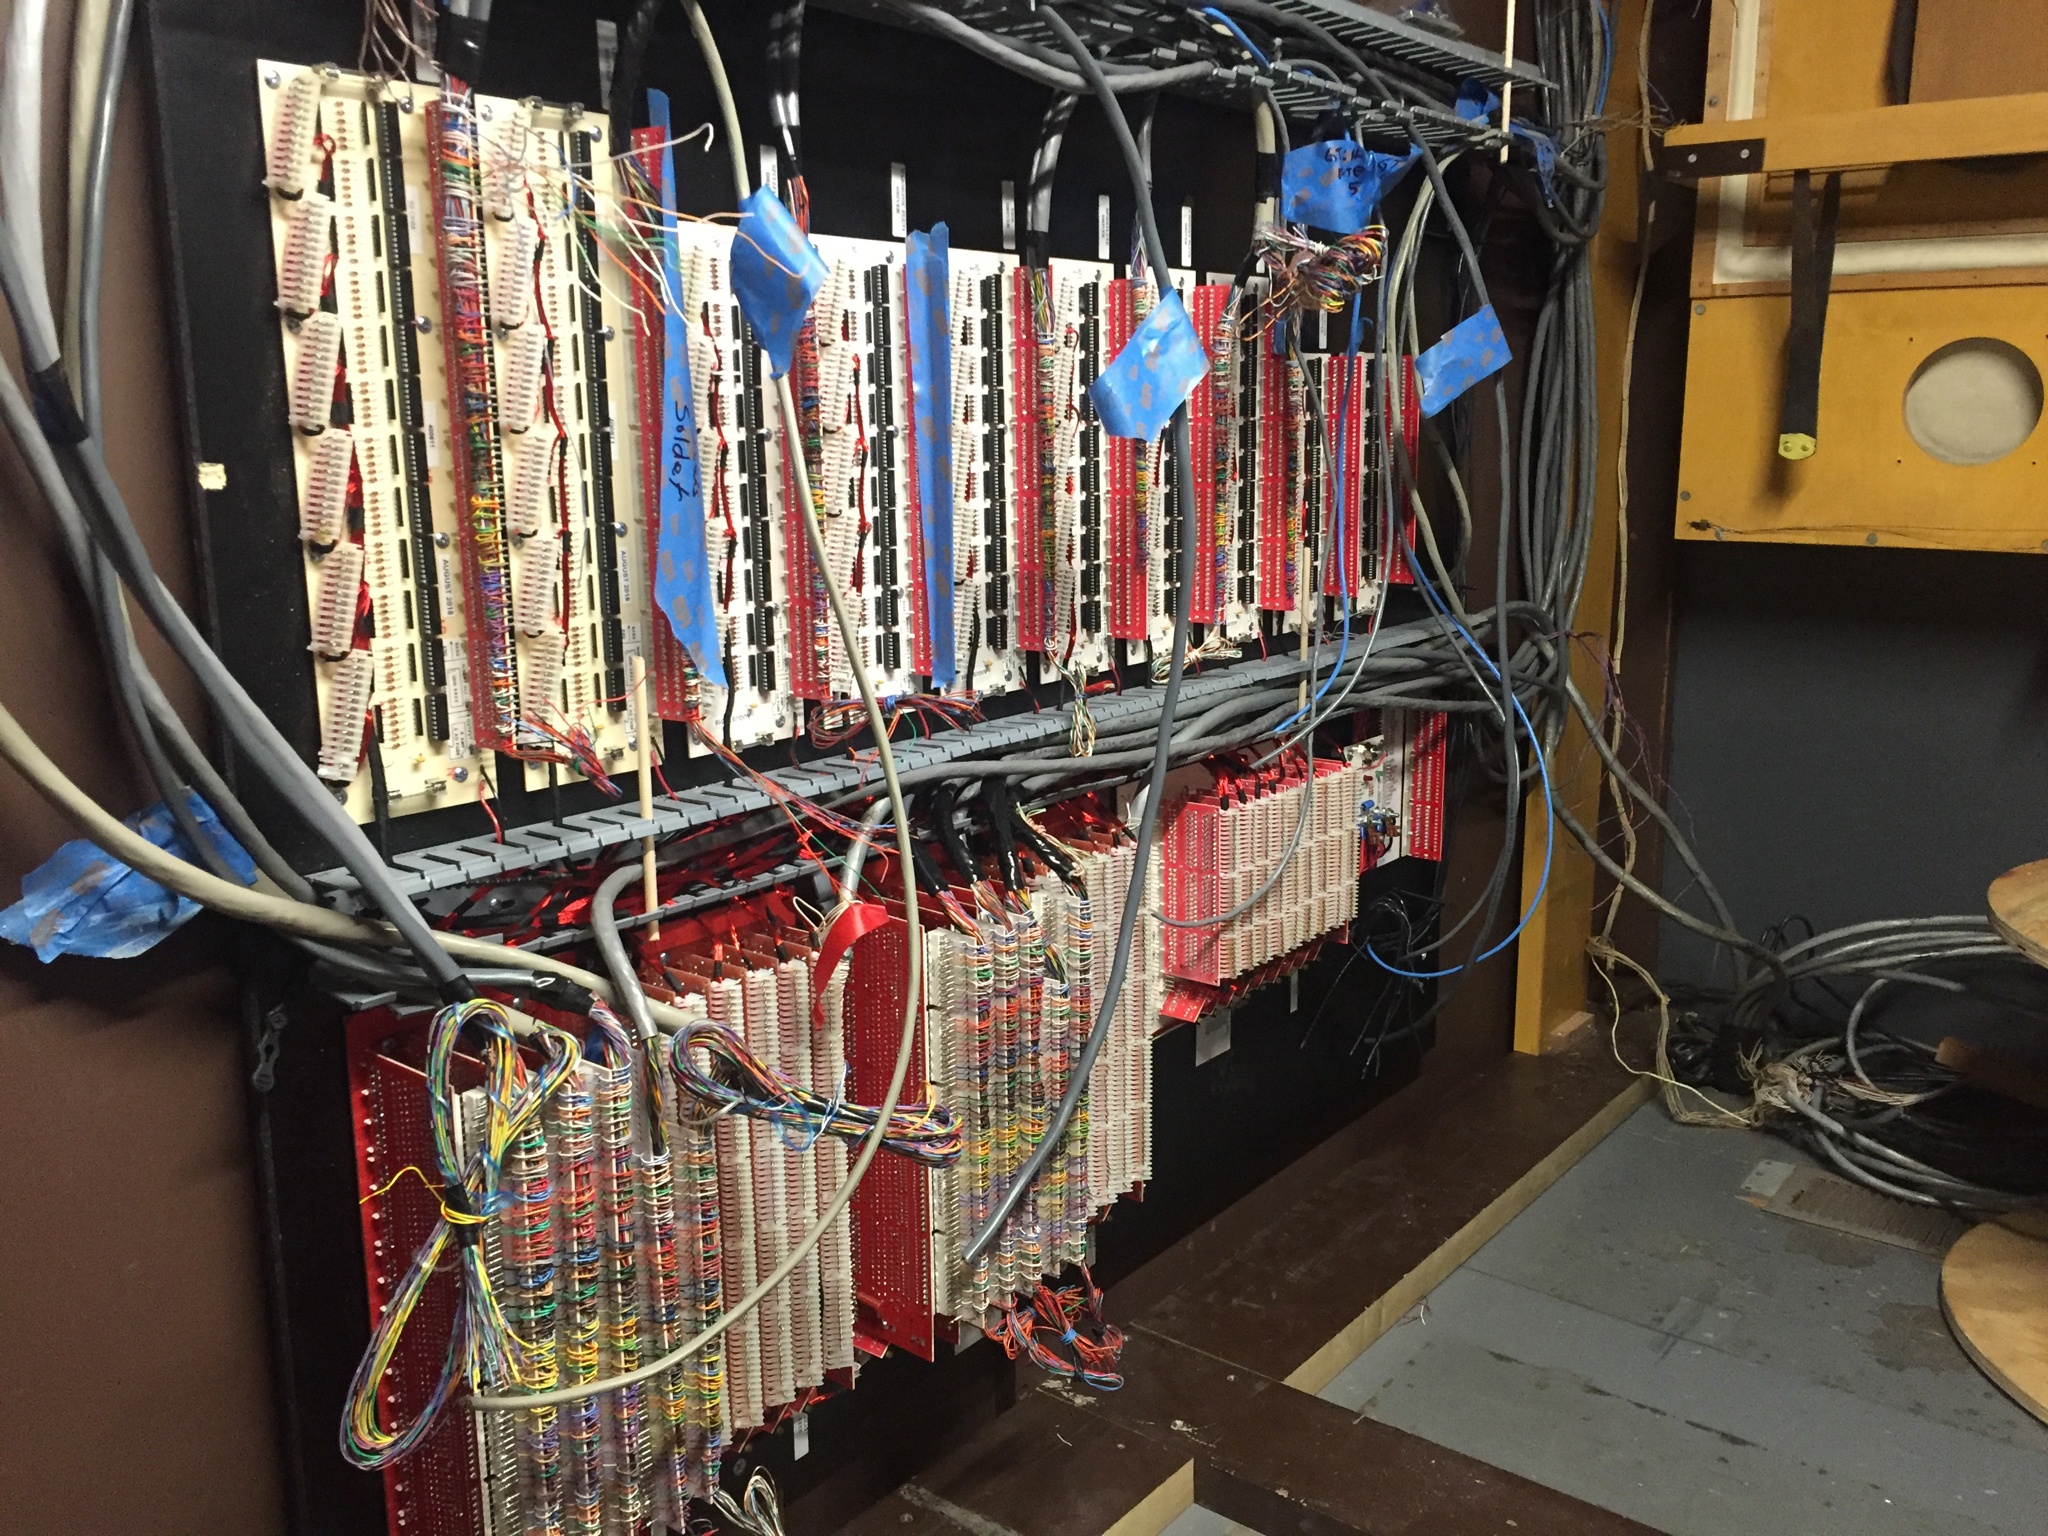
The relay 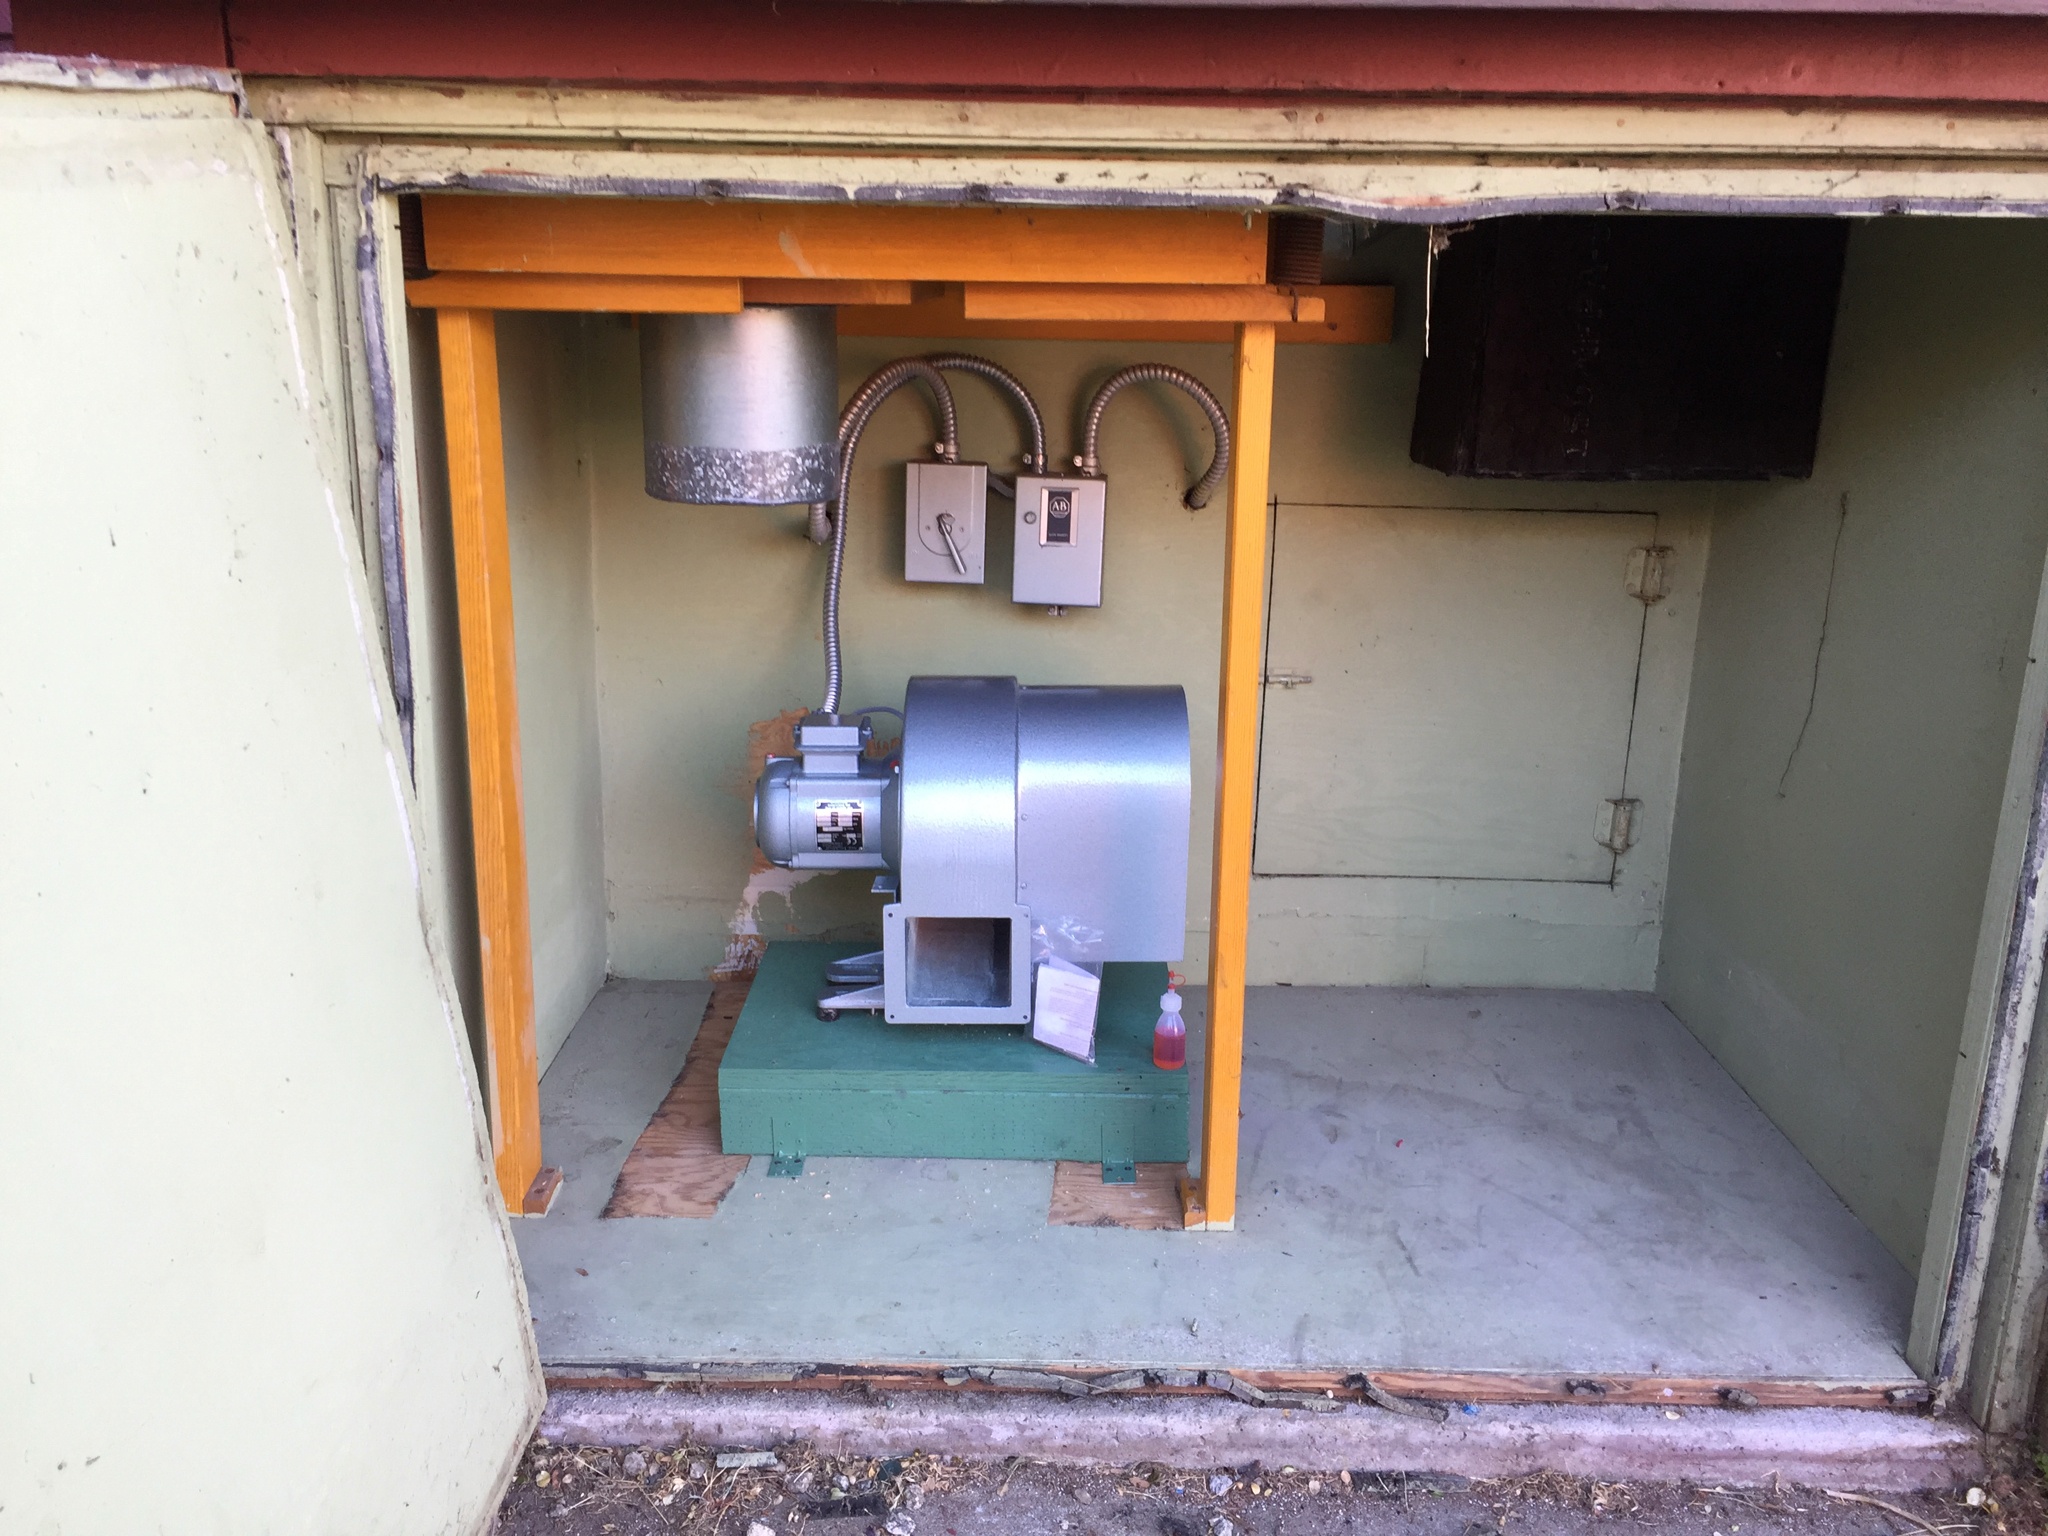
The new blower, installed.